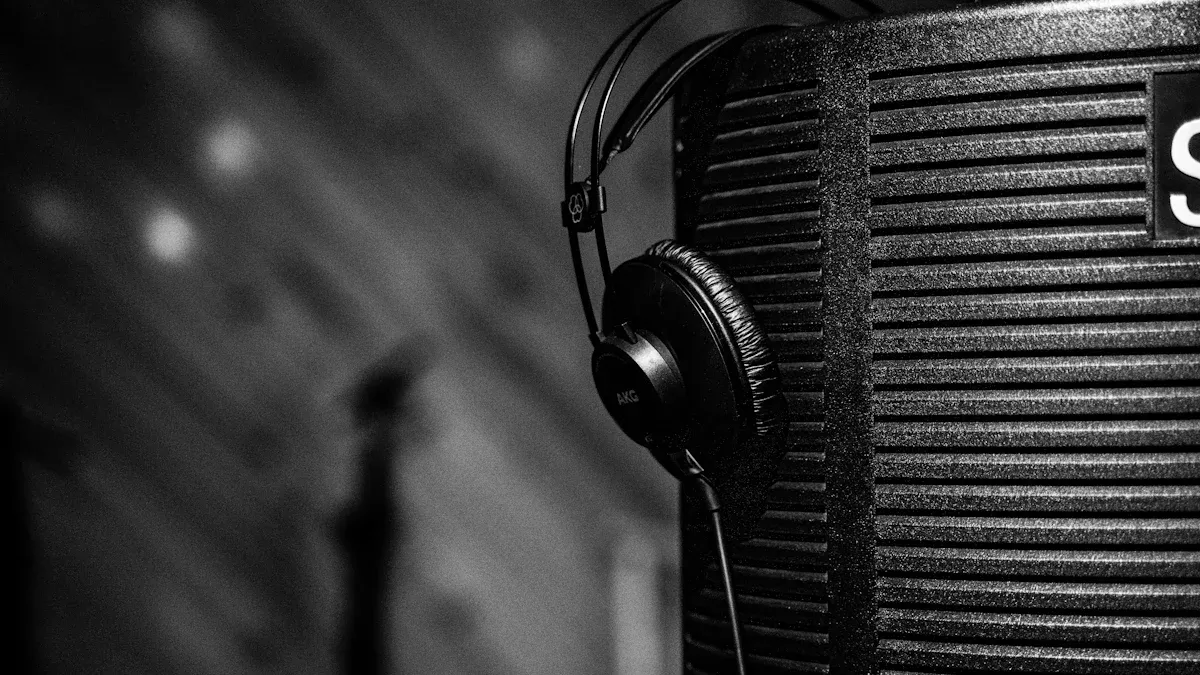
A Schalldichte Aufnahmestand can transform any workspace. Many people compare it to a soundproof box for phone calls or a home office garden pod. Each user brings different needs, skills, and expectations. Careful consideration leads to the best recording environment.
Buying a Soundproof Recording Booth
Pros of Buying a Soundproof Recording Booth
Purchasing a soundproof recording booth offers a fast and reliable solution for anyone who needs a controlled recording environment. Many commercial booths arrive as modular kits, making assembly straightforward. For example, the Studiobricks One Plus Vocal Edition Booth can be set up in about one hour with basic skills and a helper. The process uses interlocking components, so no screws or adhesives are necessary.
Manufacturers design these booths with a range of features to meet different needs. The table below highlights some of the most common features found in commercially available soundproof recording booths:
| Feature -Kategorie | Common Features and Considerations |
|---|---|
| Size and Ergonomics | Booths come in various sizes to fit different spaces. Interior layouts support comfort and equipment placement. |
| Booth Types | Options include portable, permanent, and hybrid models. Each type offers different levels of sound isolation. |
| Materials & Construction | High-quality acoustic foam, dense fabrics, and layered panels improve sound isolation and durability. |
| Belüftung | Passive vents or active fans keep air fresh without sacrificing soundproofing. |
| Beleuchtung | Integrated LED lighting with adjustable settings supports both comfort and video recording. |
| Assembly & Setup | Modular designs allow for quick assembly and easy relocation. |
| Zusätzliche Funktionen | Power outlets, cable ports, ergonomic seating, and optional upgrades like windows or caster wheels are available. |
Most soundproof recording booths include wall-to-wall acoustic foam, heavy exterior fabric, and multiple cable ports. Many models offer upgrades such as custom colors, hardwood floors, vent silencers, and windows. These features help users create a professional and comfortable recording space.
Tip: Buying a pre-made booth saves time and ensures consistent sound isolation. This option works well for users who want a plug-and-play solution.
Cons of Buying a Soundproof Recording Booth
While buying a soundproof recording booth provides convenience, some users report drawbacks. Many expect these booths to improve sound quality, but their main function is to block outside noise, not enhance acoustics. Small booth sizes can cause unwanted room modes and resonances, which may affect recording quality. These issues are often hard to fix after installation.
Some users find that pre-built acoustic panels are bulky and take up space when not in use. Foam panels may feel flimsy and often do not include mounting hardware, requiring extra purchases. Heavy panels can also be difficult to move, especially in smaller rooms.
Cost is another important factor. Building a booth from scratch usually costs between $430 and $500, depending on materials and size. In contrast, buying a commercial soundproof recording booth, such as a Whisper Room, can cost $3,000 or more. Although the commercial option offers reliability and ease of use, it comes at a much higher price.
Note: Buyers should match booth size and features to their specific needs to avoid common complaints about space and sound quality.
Building a Soundproof Recording Booth
Pros of Building a Soundproof Recording Booth
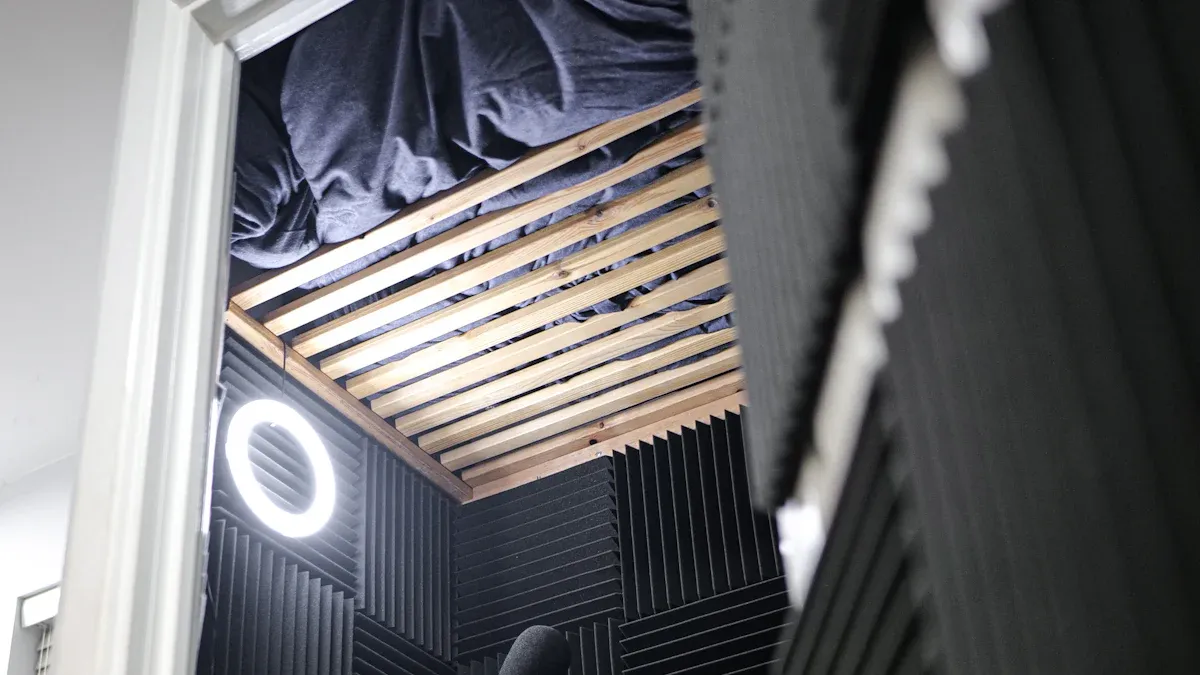
Building a soundproof recording booth gives users full control over the design and materials. Many choose this route to customize the booth for their unique space and recording needs. A custom booth can fit into tight corners, odd-shaped rooms, or even garages and sheds. This flexibility allows for creative solutions that commercial booths may not offer.
Cost savings often motivate people to build their own booths. By sourcing materials locally and using household items, builders can keep expenses low. The following table shows common materials used in DIY soundproof recording booth construction and their approximate costs:
| Material / Item | Description / Use | Approximate Cost |
|---|---|---|
| Wood blocks | Used in DIY acoustic panels and diffusers | ~$50 |
| Fabric, 2×4 lumber | Used for constructing DIY acoustic panels | Included in $250 total |
| Household soft fabrics | Blankets, comforters, towels, pillows, curtains used for sound absorption | Often free (household items) |
| Tools | Required for DIY panel construction | ~$200 |
| DIY Acoustic Treatment Setup | Combination of above materials and labor | Under $500 total |
| Output’s Eco Acoustic Panels | Commercial acoustic panels (one pack) | ~$450 per pack |
| Output’s Bass Traps | Commercial bass traps (one pack) | ~$450 per pack |
| Rug (e.g., Ikea or vintage) | Used to isolate vibrations and absorb reflections | ~$100 |
Many builders use recycled or leftover materials, which further reduces costs. Some even repurpose old furniture or use thick rugs to improve sound absorption. This approach not only saves money but also supports sustainability.
A DIY soundproof recording booth can become a rewarding project. Builders learn new skills and gain a sense of accomplishment. They can experiment with different layouts, acoustic treatments, and finishes. For those who enjoy hands-on work, the process itself can be as valuable as the finished booth.
Tip: Custom-built booths allow for unique features, such as extra windows, built-in shelves, or special lighting, tailored to the user’s workflow.
Cons of Building a Soundproof Recording Booth
Building a soundproof recording booth presents several challenges. The process often takes much longer than expected. Unlike pre-fabricated booths, which can be assembled in about an hour, a custom booth may require days or even weeks to complete. Builders must plan carefully, gather materials, and use hand tools for construction.
Common difficulties include:
- Creating a “room within a room” for double isolation requires advanced skills and specialized parts, such as soundproof doors and double-glazed windows.
- Effective soundproofing needs heavy materials. Standard insulation like rockwool or fiberglass alone does not block enough noise.
- Builders must manage seams and joints carefully to prevent sound leaks.
- The work is labor-intensive. Handling materials like fiberglass can be messy and may require protective gear.
- Achieving full sound isolation on a tight budget is rarely possible without professional help.
- Some find that even with thick walls and insulation, outside noise still enters the booth.
- Many recommend using outbuildings, such as sheds or garages, to avoid disturbing others and to simplify construction.
Note: Building a booth can be rewarding, but it demands time, effort, and patience. Some users report that moving to a quieter location works better than building a booth from scratch.
A DIY soundproof recording booth may not match the performance of commercial models. Builders often face trade-offs between cost, time, and sound isolation. The project can become expensive if mistakes occur or if upgrades are needed later.
Key Factors When Choosing a Soundproof Recording Booth
Budgetüberlegungen
Budget plays a major role in the decision-making process. Building a booth often costs less upfront, especially when using recycled materials or household items. However, unexpected expenses can arise during construction. Pre-made booths usually have a higher initial price but include professional engineering and features. Buyers know the total cost before purchase, which helps with financial planning.
Time Commitment
Time investment differs greatly between options. Assembling a pre-made booth, such as the Studiobricks model, takes about one hour with two people. No screws or adhesives are needed, making the process quick and simple. In contrast, building a booth from scratch requires many hours or even days. Tasks include doubling walls, adding sound-absorbing materials, and installing acoustic treatments. Tight deadlines can lead to rushed decisions and may affect the final quality.
Technical Skills Needed
Building a booth requires several skills:
- Carpentry for framing and assembly
- Knowledge of soundproofing materials and techniques
- Acoustic evaluation for testing and adjustments
Installing a pre-made booth needs less technical skill. Most users only need to position, seal, and complete minor assembly. The design already provides sound isolation.
Schallschutzpegel
| Option | Sound Isolation Level | Typical Use Cases |
|---|---|---|
| Pre-made Booths | Consistent, professional | Studios, offices, clinics |
| DIY Booths | Varies by skill and materials | Home studios, personal projects |
Pre-made booths deliver reliable Schallisolation. DIY booths can perform well but depend on construction quality and materials.
Space and Design Flexibility
DIY booths offer high flexibility. Builders can choose the size, shape, and materials to fit unique spaces. They can add custom features like bass traps, floating floors, or special acoustic panels. Pre-made booths provide less flexibility but ensure a professional finish.
Long-Term Use and Upgrades
DIY setups allow easy upgrades. Users can add or move acoustic panels with removable mounting methods. Custom-sized panels fit unique spaces. Pre-made booths also support some upgrades, but changes may be limited by the original design.
Soundproof Recording Booth Decision Guide
Beim Kauf macht Sinn
Kauf einer schalldichten Aufnahmekabine Funktioniert am besten für Benutzer, die eine schnelle, zuverlässige Lösung mit professionellen Ergebnissen benötigen. Viele Musiker, Voice-Over-Künstler, Podcasters und Audioprofis wählen vorgefertigte Stände für ihre konsequente Klangisolation und Benutzerfreundlichkeit. Diese Stände reduzieren das Hintergrundgeräusch und verhindern, dass der Ton in andere Räume eingeht. Benutzer sparen Zeit für Setup und genießen Funktionen wie integrierte Beleuchtung, Belüftung und Kabelanschlüsse.
| Benutzerart | Vorteile von vorgefertigten schalldichten Ständen |
|---|---|
| Musiker | Verbesserte Klangqualität, reduziertes Hintergrundrauschen, kontrollierte Umgebung |
| Voice-Over-Künstler | Professionelle Klangqualität, minimiertes externes Rauschen, verstärkter Stimmfokus |
| Podcasters | Reduzierte Raumreflexionen, ablenkungsfreie Aufzeichnungsumgebung |
| Audioprofis | Effiziente Aufnahme mit weniger Postproduktion, akustischer Kontrolle |
Tipp: Vorgefertigte Stände passen zu denen, die sich eher auf die Aufnahme als auf den Bau konzentrieren möchten. Sie helfen Benutzern, die jederzeit aufzeichnen müssen, ohne andere zu stören.
Beim Aufbau ist die bessere Option
Einen Kabine bauen Appelle an Benutzer, die die volle Kontrolle über Größe, Funktionen und Budget wünschen. Viele Menschen bauen ihre eigenen Stände, um laute Aufnahmen aus Haushaltsgeräuschen, Verkehr oder Bau zu vermeiden. Einige wollen spät in der Nacht aufzeichnen, ohne die Familie oder Nachbarn zu stören. Andere suchen einen individuellen Raum mit Gut Belüftung, Beleuchtung und akustische Behandlung.
- Eine verstärkte Zeit zu Hause hat viele dazu gebracht, Musik, Podcasting oder Videoerstellung zu probieren.
- In den meisten Häusern fehlen eingebaute Studios, sodass der Bau eines Standes die Klangqualität verbessert.
- DIY-Projekte reichen von einfachen, kostengünstigen Setups bis hin zu robusten, ständigen Räumen.
- Bauherren können lokale Materialien verwenden und Funktionen wie schwimmende Wände oder zusätzliche Schallabsorption hinzufügen.
Eine Fallstudie von Instructables zeigt eine erfolgreiche, schalldichte DIY -Schallaufzeichnungskabine, die in einem Keller eingebaut ist. Der Baumeister verwendete Materialien aus lokalen Geschäften und erreichte einen ruhigen Raum für tägliche Musik und Projekte. Der Kabine reduzierte das Geräusch so sehr, dass ein Drum -Set so leise klang wie ein ferner Fernseher.
Hinweis: Das Erstellen eines Standes eignet sich gut für diejenigen, die praktische Projekte genießen und eine benutzerdefinierte Lösung für die Anforderungen an die Aufnahme wünschen.
Die Wahl zwischen Kauf oder Aufbau hängt von persönlichen Zielen, Fähigkeiten und Ressourcen ab. Einige Bauherren erzielen mit fortschrittlichen Techniken eine ausgezeichnete Klangisolation und akustische Kontrolle. Kommerzielle Kabinen bieten konsistente Ergebnisse und Komfort. Durch das Abwägen der Vor- und Nachteile können Benutzer den besten Weg für ihre Aufzeichnungsanforderungen auswählen.
FAQ
Wie viel Platz braucht ein schalldichtes Aufnahmestand?
Die meisten Stände benötigen mindestens 4 × 4 Fuß Bodenfläche. Benutzer sollten ihr Zimmer messen, bevor sie sich für eine Standgröße entscheiden.
Kann jemand nach der Montage eine schalldichte Kabine bewegen?
Ja. Viele modulare Stände ermöglichen eine einfache Demontage und Verlagerung. Benutzer können sie bei Bedarf in einen neuen Raum oder Gebäude verlegen.
Welche Wartung benötigt eine schalldichte Kabine?
Regelmäßig nach Dichtungen prüfen, saubere Belüftungsfilterund wischen Sie Oberflächen mit einem weichen Tuch ab. Die richtige Pflege hilft bei der Aufrechterhaltung der Klangisolation und des Standes auf die Leistung.