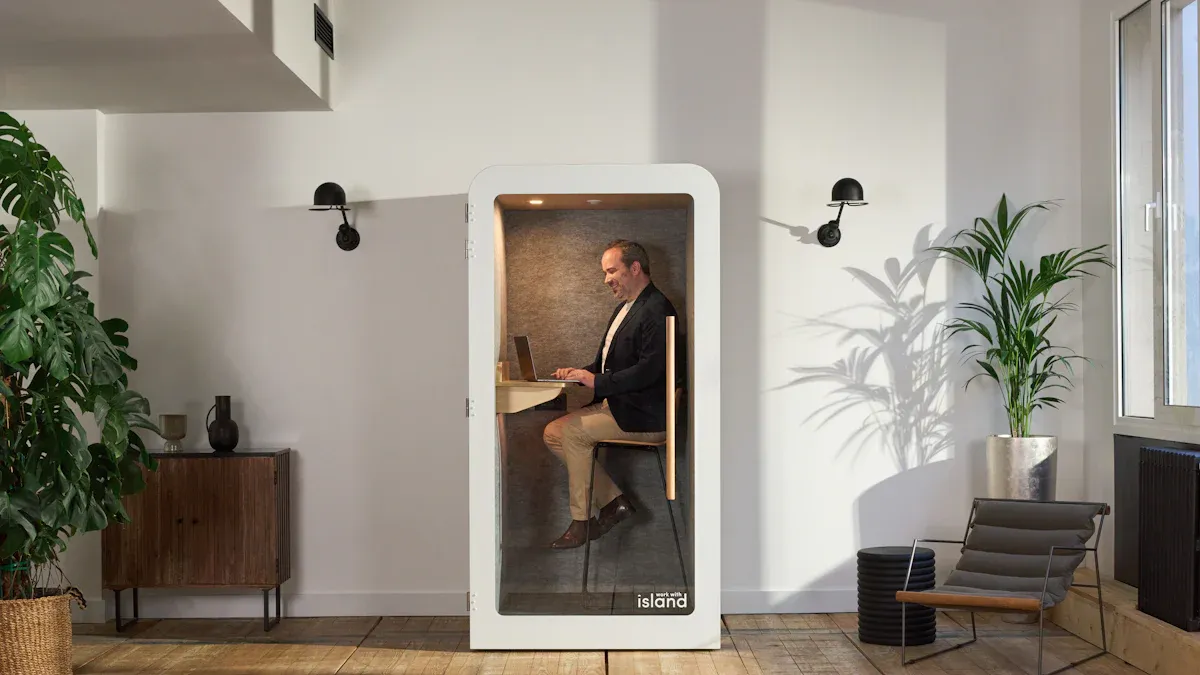
A meeting phone booth offers fast and simple installation. Many offices use portable office pods that measure just 2.3m x 1.0m, fitting tight spaces. Capsule office pod users report quick setups. The soundproof booth for home office setups often arrives with “Fast Assemble” features and supplier support within 7.75 hours.
| Feature | Numerical Detail | Explanation |
|---|---|---|
| Dimensions | 2.3m x 1.0m | Slim design fits narrow spaces, enabling easy placement and setup |
| Production Capacity | 1000 units/month | High volume suggests streamlined assembly |
| Average Response Time | ≤7.75 hours | Quick supplier support aids rapid setup |
| Assembly Description | Fast Assemble | Implies quick and easy installation |
What Makes a Meeting Phone Booth Easy to Install?
Pre-fabricated and Modular Design
A pre-fabricated and modular design stands at the core of easy installation for any meeting phone booth. Manufacturers build these booths in controlled factory settings, ensuring each component fits perfectly. Workers can flat-pack the units, making transportation and delivery simple. Offices benefit from this approach because it reduces build-out time and costs.
- Modular phone booths gained popularity after COVID-19, as open offices needed quiet, private spaces.
- Modular units can expand or contract, adapting to business growth or changing needs.
- Companies can reconfigure layouts quickly, without waiting for new permits.
- Sustainability improves through reduced waste and the use of eco-friendly materials, such as recycled plastics for soundproofing.
Modular architecture increases office adaptability and efficiency. Employees enjoy quiet, focused environments, while businesses save on resources and support carbon neutrality.
Step-by-Step Assembly Guides
Clear, step-by-step assembly guides make the setup process straightforward. Most meeting phone booth kits include detailed instructions with diagrams or photos. These guides break down the process into manageable steps, so users can follow along without confusion.
- Each step explains which parts to use and how to connect them.
- Visual aids help users identify components and tools.
- Troubleshooting tips address common questions or mistakes.
A well-designed guide ensures that even those with minimal experience can assemble the booth quickly and safely.
Minimal Tools and Skills Needed
Setting up a meeting phone booth does not require advanced skills or specialized equipment. Most manufacturers design their products for assembly with basic hand tools, such as screwdrivers and Allen wrenches.
- Users do not need construction experience.
- The process involves simple tasks like tightening bolts or snapping panels into place.
- Teams can complete installation with just a few people.
Minimal tool requirements and straightforward instructions allow offices to set up their booths efficiently, saving time and reducing stress.
What You Need to Get Started with a Meeting Phone Booth
Basic Tools Checklist
A successful installation begins with the right tools. Most phone booth kits require only a few basic items. Teams often use a Phillips screwdriver, Allen wrench, and a level. Some kits may include these tools, but it is wise to check before starting. A tape measure helps ensure accurate placement. Gloves protect hands during assembly.
| Tool | Purpose |
|---|---|
| Phillips Screwdriver | Tightening screws |
| Allen Wrench | Securing bolts and fasteners |
| Level | Ensuring booth sits evenly |
| Tape Measure | Measuring placement and fit |
| Gloves | Hand protection |
Tip: Gather all tools before opening the packaging to save time and avoid interruptions.
Preparing the Space and Location
Proper preparation of the installation site ensures a smooth process. Teams should select a spot with enough room for assembly and future use. Research shows that ventilation, lighting, and acoustics play a key role in user comfort. Placing the booth near power outlets supports lighting and ventilation systems. Checking for ceiling sprinklers is important, especially in offices with fire safety systems. Small booths under 100 square feet usually do not need dedicated sprinklers if the area is already covered.
- Measure the area to confirm enough space.
- Ensure access to power and network connections.
- Check for proper ventilation and lighting.
- Review fire safety and sprinkler coverage.
Unpacking and Organizing Components
Unpacking the booth components in an organized way speeds up assembly. Teams should clear the area and lay out all parts on a clean surface. Sorting panels, hardware, and accessories by type makes each step easier. Reviewing the instruction manual before starting helps avoid mistakes.
- Place all panels and hardware in order.
- Check the parts list to confirm nothing is missing.
- Keep small items like screws in containers to prevent loss.
- Read through the assembly guide for a clear overview.
Staying organized from the start helps prevent delays and ensures a smooth installation.
Meeting Phone Booth Step-by-Step Assembly Process
Placing the Base and Leveling
The assembly process begins with positioning the base. Teams should place the base on a clean, flat surface. Using a level, they check that the base sits evenly. This step prevents future problems with door alignment and panel fitting. If the floor is uneven, adjustable feet or shims help achieve a stable foundation. Proper leveling ensures the booth remains sturdy and safe during use.
Tip: Always double-check the base with a level before moving to the next step. A stable base supports the entire structure.
Attaching Panels and Frame
After leveling the base, the next step involves attaching the wall panels and frame. Workers align each panel with the base and secure it using bolts or fasteners provided in the kit. The frame connects at the corners, locking the structure together. Teams should follow the assembly guide closely, tightening each connection as they go. This method creates a strong shell that supports the rest of the booth.
- Align each panel with the base.
- Secure panels with bolts or fasteners.
- Connect the frame at each corner.
- Tighten all connections for stability.
A uniform fit between panels and frame helps maintain soundproofing and structural integrity. Checking the seams for gaps ensures the booth will block noise effectively.
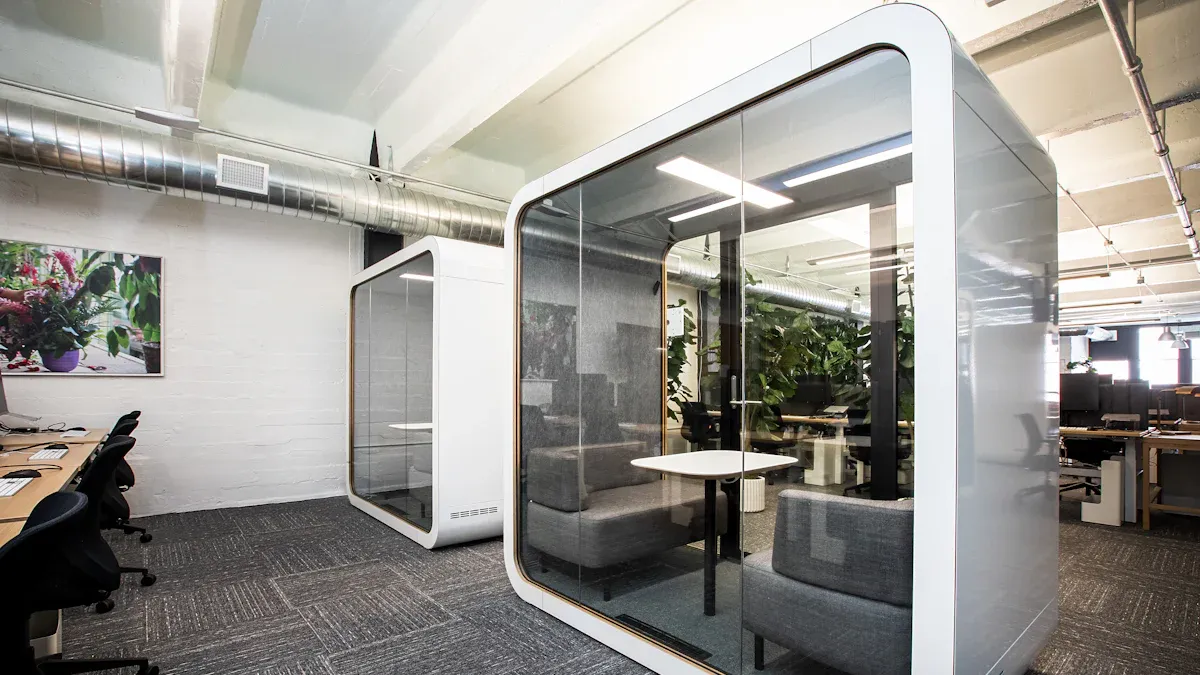
Installing Doors, Windows, and Shelves
Once the main structure stands, teams install the doors, windows, and any interior shelves. The door fits into pre-designed holes and attaches with hinges. Workers add sealing strips around the door and window frames to improve sound isolation. Shelves or desks mount inside the booth, following the manufacturer’s instructions.
- Attach the door to the frame using hinges.
- Place sealing strips around doors and windows.
- Install shelves or desks at the desired height.
A smooth door operation and tight seals around glass and frames help keep outside noise out. Proper installation of shelves provides a comfortable workspace for users.
Setting Up Ventilation and Lighting
Ventilation and lighting systems play a key role in comfort and productivity inside a meeting phone booth. Modern office pods use low-noise ventilation systems that refresh air every few minutes. Some models feature three quiet fans operating at just 19 dB, providing airflow that exceeds industry standards. These fans keep the air fresh and filtered, even during long meetings.
Lighting often uses intelligent sensors that turn on when someone enters the booth. Motion-activated LED lights, set at 3000K, create a warm and comfortable environment. Frontal lighting helps illuminate faces for video calls, avoiding harsh shadows. Some booths include glass walls or skylights to let in natural light, making the space feel open and bright.
- Install ventilation fans and connect to power.
- Check that airflow meets recommended standards.
- Mount LED lights and test motion sensors.
- Adjust lighting to avoid shadows on faces.
Note: Good ventilation maintains air quality and comfort. Proper lighting supports video calls and focused work.
Final Checks for Stability and Soundproofing
The last step involves a thorough inspection to ensure stability and soundproofing. Teams use calibrated sound level meters to test the booth’s noise reduction across different frequencies. They inspect door seals, window gaskets, and panel seams for uniformity. Floating floor isolation gaps and neoprene pads help prevent sound from traveling through the structure.
Regular checks of the booth’s components help maintain performance over time. Teams compare current soundproofing results to baseline measurements to spot any weak points. They also review the quality of surface treatments on frames and panels, which protects against wear and corrosion.
- Test soundproofing with sound level meters.
- Inspect door and window seals for tightness.
- Check seams and panel connections for uniformity.
- Verify stability by gently rocking the booth.
- Review installation records and certifications.
Keeping detailed documentation of assembly and inspections helps ensure long-term performance and user satisfaction.
How Long Does It Take to Set Up a Meeting Phone Booth?
Typical Installation Time
Installation times for office phone booths vary by model and design. Most modern booths arrive with modular components and clear instructions. This approach helps teams finish assembly quickly. Recent data shows that many popular models require between 1 and 3 hours for setup. The number of installers and booth complexity can influence the total time.
| Product Name | Installation Duration | Number of Installers | Notes |
|---|---|---|---|
| HushMeet | 2.5 – 3 hours | 2 | Advanced acoustic solutions |
| The Meeting Room by ROOM | Less than 3 hours | 3 | Modular conference room |
| Nook Open Shelter | 45 minutes | 2 | Open on one side to reduce claustrophobia |
| The Phone Booth by ROOM | Less than 1 hour | 2 | Solo phone calls and focused work |
| TalkZone | Up to 3 hours | N/A | Quiet space for calls and projects |
| The Huddle Pod by Nook | 90 minutes | 2 | Flexible huddle solutions |
| Om Pod | 20-30 minutes | 2 | Quiet haven for privacy |
| Nook Solo Booth | 45 minutes | 2 | Personal quiet space |
Most teams complete assembly in 1 to 2.5 hours. Some compact models take less than an hour.
Factors That Affect Assembly Duration
Several factors can change how long installation takes. Larger booths with more panels need extra time. Teams with more experience often work faster. The number of installers also matters. Two or three people can finish the job more quickly than one person alone. The workspace layout can help or slow down the process. Tight spaces may require extra steps to move parts into position. Clear instructions and organized tools make the job easier.
Tip: Prepare the area and review the manual before starting. This step can save time and prevent mistakes.
Common Challenges When Installing a Meeting Phone Booth
Tight Office Spaces
Many offices have limited space for new installations. Teams often find it challenging to move large panels or frames through narrow hallways or doorways. Careful planning helps avoid these issues. Measuring the path from the delivery point to the final location ensures that every component fits. Some teams use furniture sliders or dollies to move heavy parts safely.
Tip: Clear the area before starting. Remove obstacles and create a direct path to the installation site.
Missing or Damaged Parts
Sometimes, a kit may arrive with missing or damaged parts. This situation can delay the assembly process. Teams should check the parts list before starting. Inspecting each item helps spot problems early. If a part is missing or damaged, contacting the supplier quickly leads to a fast solution. Many manufacturers offer responsive support and can ship replacement parts promptly.
| Step | Action |
|---|---|
| 1. Check inventory | Compare items to parts list |
| 2. Inspect parts | Look for damage or defects |
| 3. Contact support | Report issues immediately |
Assembly Errors and Quick Fixes
Assembly errors can happen, especially for first-time installers. Common mistakes include attaching panels in the wrong order or not tightening bolts enough. Teams should follow the instructions closely. If an error occurs, most modular designs allow for easy corrections. Loosening a few bolts or swapping panels often solves the problem.
Note: Taking time to review each step prevents most errors during meeting phone booth installation.
When to Consider Professional Assembly for Your Meeting Phone Booth
Large or Complex Booth Models
Some office pods come in larger sizes or with advanced features. These models may include extra panels, integrated technology, or custom finishes. Professional installers have the experience to handle these complex setups. They use specialized tools and follow strict guidelines. This approach helps ensure the booth works as designed and meets all safety standards.
For booths with advanced soundproofing or built-in electronics, professional assembly can save time and prevent mistakes.
Limited Staff or Time Constraints
Many offices have small teams or busy schedules. Staff may not have the time to assemble a booth during work hours. Professional assembly services can complete the job quickly. They bring all the needed tools and work efficiently. This option allows employees to focus on their main tasks while experts handle the installation.
- Offices with tight deadlines benefit from fast, expert assembly.
- Professional teams reduce downtime and avoid disruptions.
Warranty and Safety Considerations
Manufacturers often offer warranties that require professional installation. This ensures the booth meets all safety and quality standards. Trained installers know how to secure each part and test the booth for stability. They also check electrical systems and ventilation. Choosing professional assembly can protect the warranty and provide peace of mind.
Always review the warranty terms before starting installation. Professional assembly may be the best choice for long-term reliability.
- Offices can set up modern phone booths with basic tools and clear instructions.
- Teams achieve the best results by preparing the space and following each step.
Tip: For complex models, professional assembly ensures safety and warranty protection.
FAQ
How many people are needed to assemble a meeting phone booth?
Most teams use two people for assembly. This approach ensures safety and speeds up the process.
Can one person set up a meeting phone booth alone?
One person can assemble smaller booths. Larger models require at least two people for stability and safety.
What if a part is missing during assembly?
Contact the supplier immediately. Most companies provide fast support and can ship replacement parts quickly.